Guide for New Contributors to Start avoid Pitfalls

Preface
As a first-time developer in the Shenyu community, I encountered some "Pitfalls" that were not mentioned in the tutorials I followed to start and develop the project. I have documented the detailed steps I took to start shenyu, shenyu-dashboard, shenyu-website in this blog, hoping to help more new contributors in the community.
Environmental Preparation
- Correct local installation of
JDK17+ - Properly install
Gitlocally - Correctly install Maven
3.6.3+ - Choose a development tool, this article uses
IDEAas an example
ShenYu Backend Startup Guide
Install and Configure Maven
Maven is a cross-platform project management tool . As the Apache organization's top open source projects , its main service for Java-based platform project creation , dependency management and project information management.
-
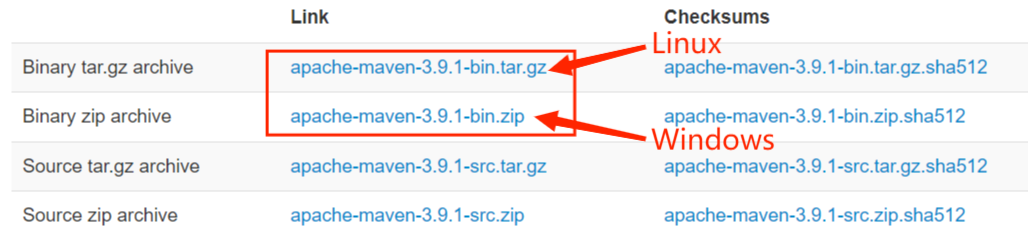
Download maven and extract it to a path with no Chinese and no spaces.
-
Add the
bindirectory under themavendirectory to the environment variables. ForWindows, if the download directory isE:\apache-maven-3.9.1, addE:\apache-maven-3.9.1\binto thePathsystem variable. -
Verify that the installation was successful. Type
mvn -vin the cmd window, and if the Maven version and Java version appear, the installation is successful. This is shown below:C:\Users\pc>mvn -vApache Maven 3.9.1 (2e178502fcdbffc201671fb2537d0cb4b4cc58f8)Maven home: E:\apache-maven-3.9.1Java version: 18.0.1.1, vendor: Oracle Corporation, runtime: C:\Program Files\Java\jdk-18.0.1.1Default locale: zh_CN, platform encoding: UTF-8OS name: "windows 10", version: "10.0", arch: "amd64", family: "windows" -
To speed up the download of project-related dependencies, you need to change the Maven mirrors, here add Aliyun and other mirrors. Change the
<mirrors> </mirrors>tag pair inconf/settings.xmlto the following:<mirrors><mirror><id>alimaven</id><name>aliyun maven</name><url>http://maven.aliyun.com/nexus/content/groups/public/</url><mirrorOf>central</mirrorOf></mirror><mirror><id>alimaven</id><mirrorOf>central</mirrorOf><name>aliyun maven</name><url>http://maven.aliyun.com/nexus/content/repositories/central/</url></mirror><mirror><id>maven</id><mirrorOf>central</mirrorOf><name>name_</name><url>http://repo1.maven.org/maven2</url></mirror><mirror><id>junit</id><mirrorOf>central</mirrorOf><name>junit address/</name><url>http://jcenter.bintray.com/</url></mirror></mirrors>and add
<localRepository>E:/maven_local_repository</localRepository>to the next line of</mirrors>to set the location of Maven local repository. You can specify the exact location yourself.
Pull ShenYu Code
-
Fork ShenYu repository on Github to your own repository, where you can develop and commit PRs in the future
-
Use Git to download the repository from the previous step locally:
git clone git@github.com:${YOUR_USERNAME}/${TARGET_REPO}.gitIf prompted for a long file name, execute the following command via the command line:
git config --global core.longpaths trueTips: If you encounter the following error or have network issues preventing you from pulling all the code:
RPC failed; curl 92 HTTP/2 stream 5 was not closed cleanly: CANCEL (err 8) 2057 bytes of body are still expected fetch-pack: unexpected disconnect while reading sideband packet early EOF fetch-pack: invalid index-pack outputYou can execute the following commands to first pull a single version of the code, then fetch the full code:
git clone https://github.com/apache/shenyu.git --depth 1cd ./shenyugit fetch --unshallow
ShenYu First Start
Preparation
-
Compile with Maven in the
shenyudirectory:mvn clean install -Dmaven.javadoc.skip=true -B -Drat.skip=true -Djacoco.skip=true -DskipITs -DskipTests -
Configure IDEA environment. Open
shenyuproject with IDEA, clickFile->Settingsin the top left corner, and configure Maven as shown below. WhereUser settings fileselect yoursettings.xmldirectory, and thenLocal repositorywill automatically load thelocalRepositorypath set insettings.xml: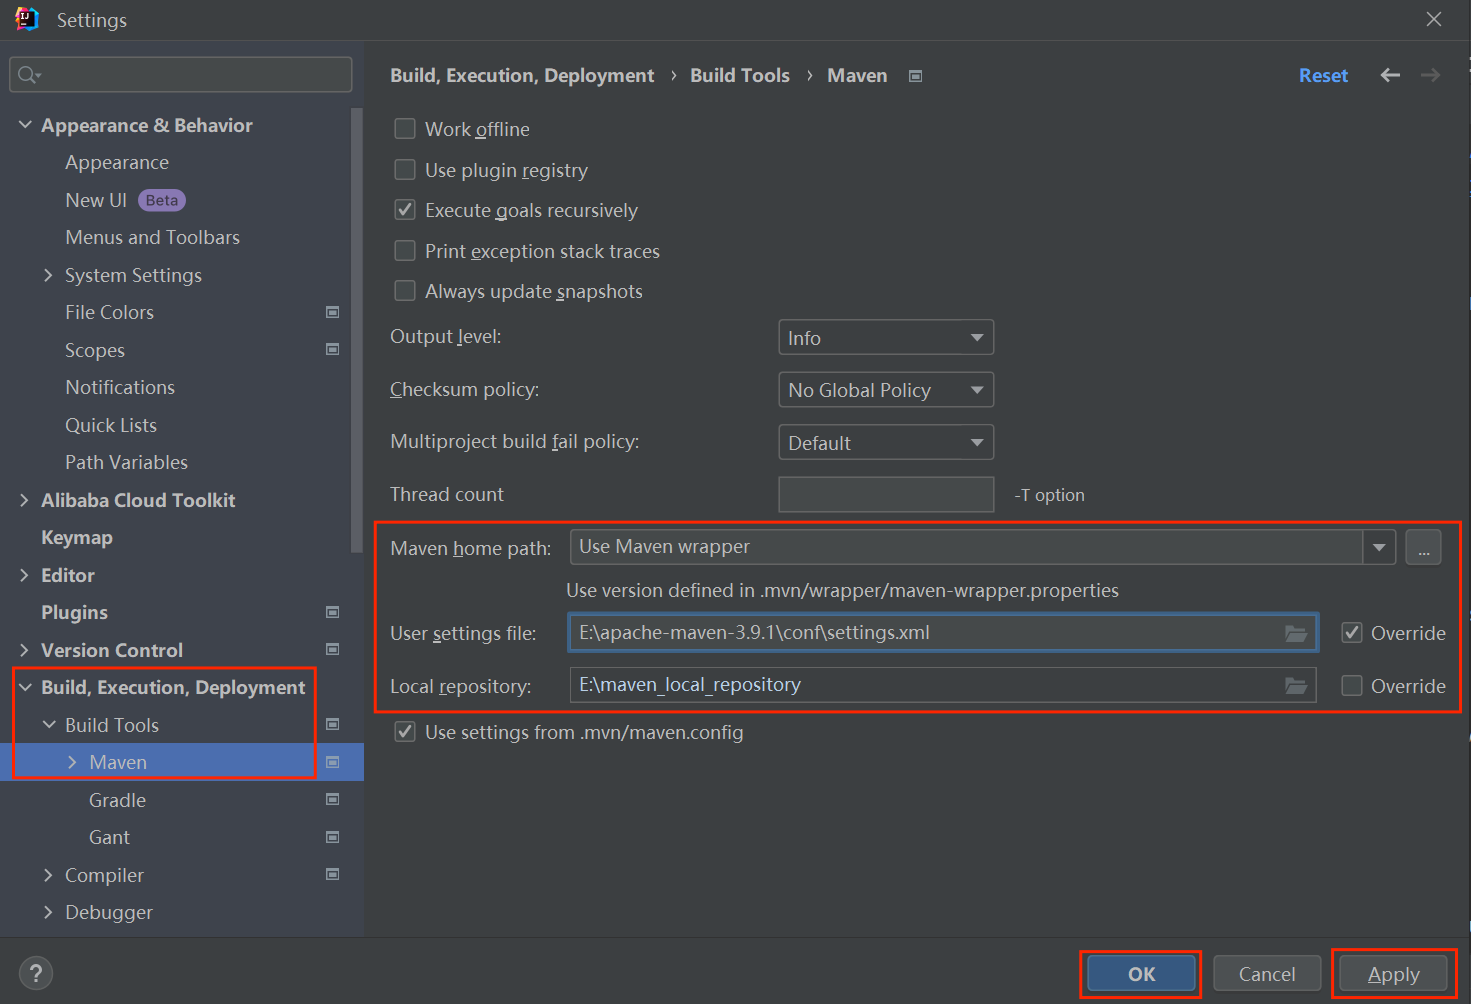
-
At this point, IDEA will automatically download the project-related dependencies, you need to wait for a while, when finished, as shown in the following figure:
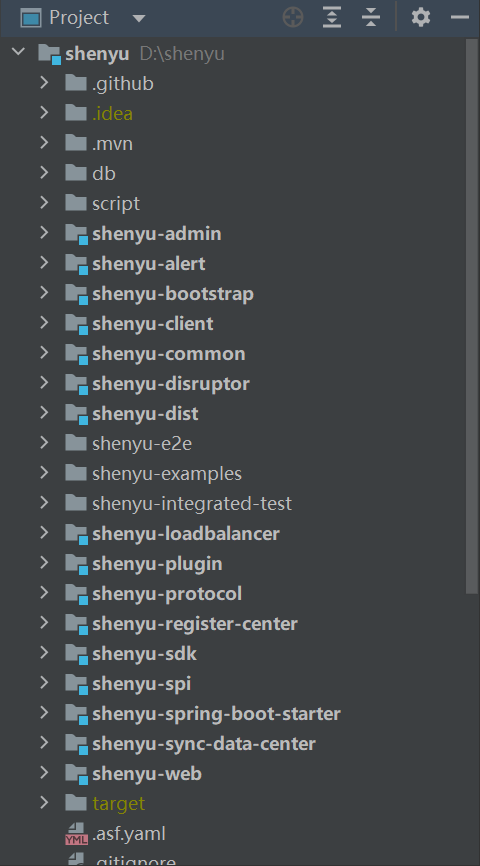
As you can see,
shenyu-e2e,shenyu-examples,shenyu-integrated-testare not marked as Maven projects by IDEA and need to be added manually. Select thepom.xmlfile in the package and right-clickAdd as Maven Project. If the shenyu-e2e build fails, then add the<relativePath>. /pom.xml</relativePath>to<relativePath/>.
Start Gateway Service
-
Start the
shenyu-adminconsole (H2 database is used by default)
-
start
shenyu-bootstrap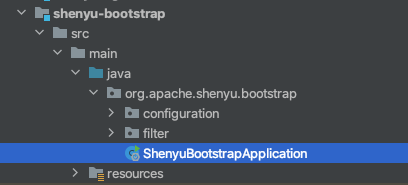
By this point, the shenyu gateway has been started.
We can open the browser and access the admin console: http://localhost:9095/
Default account: admin , default password: 123456
Start Application Service
Apache ShenYu provides samples of Http, Dubbo, SpringCloud and other applications to access the shenyu gateway, located in the shenyu-example module, here the Http service is used as an example.
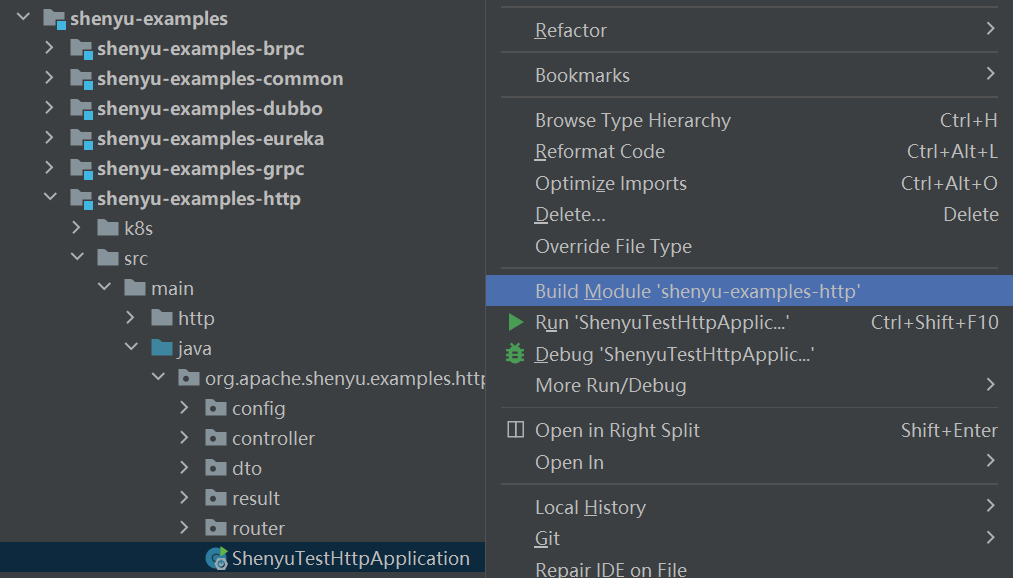
Start shenyu-examples-http。
At this point, shenyu-examples-http will automatically register the interface methods annotated with @ShenyuSpringMvcClient and the relevant configuration in application.yml to the gateway. We can open the admin console and see the configuration in Client List -> Proxy -> divide.
Test Http Request
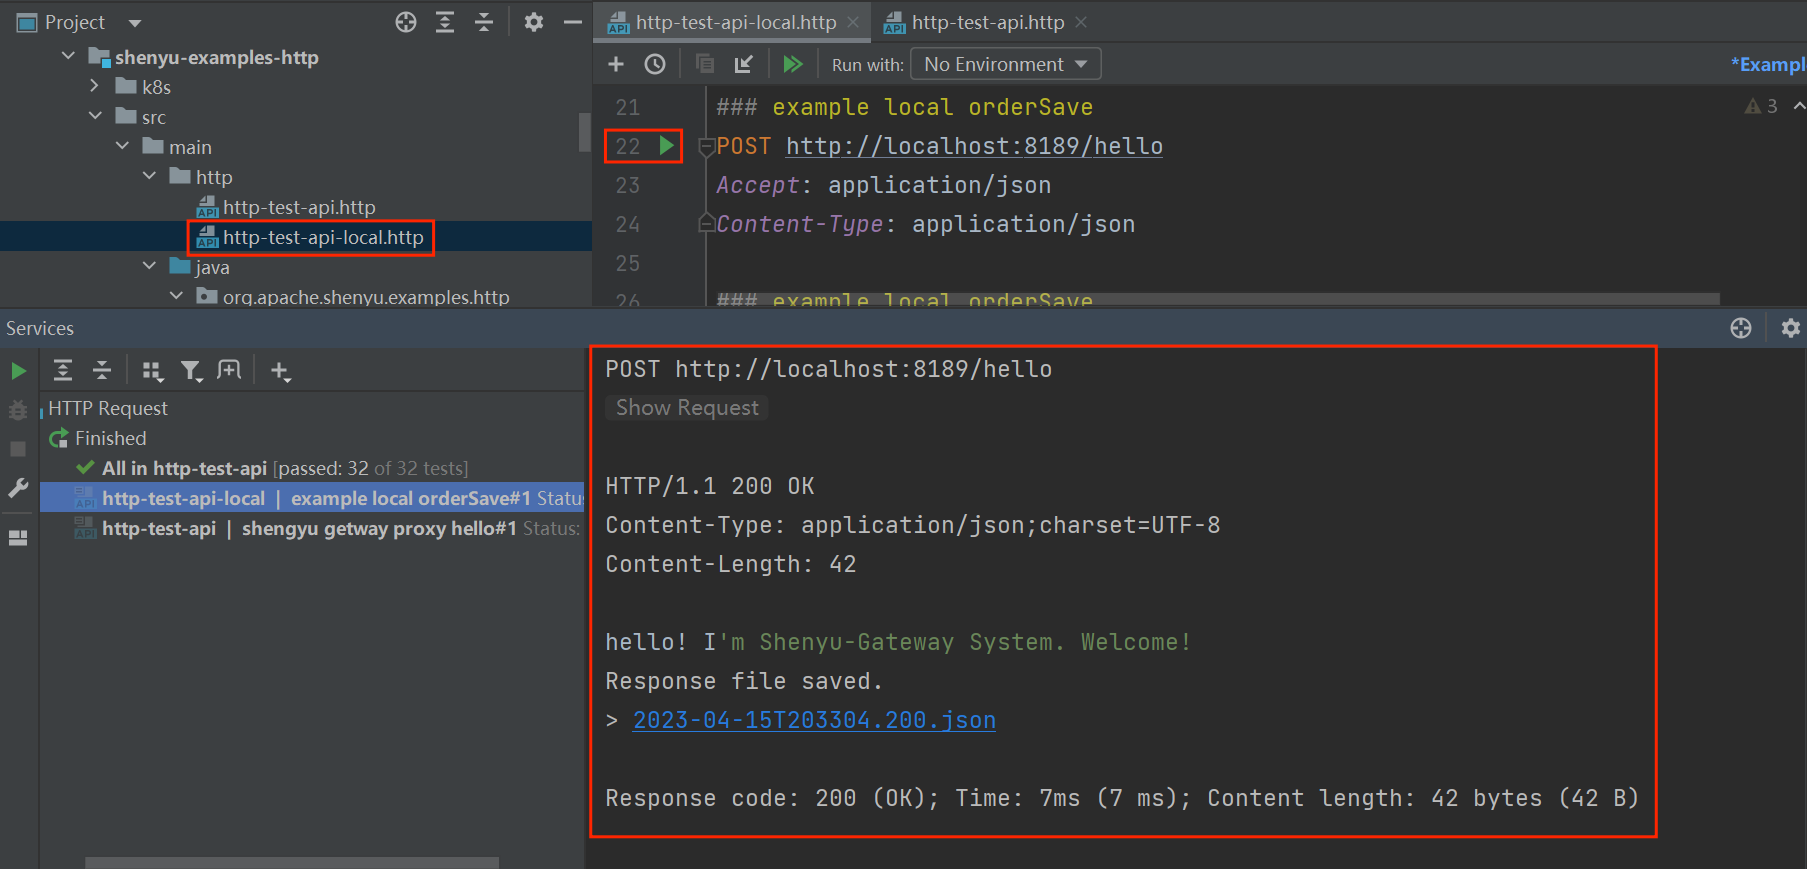
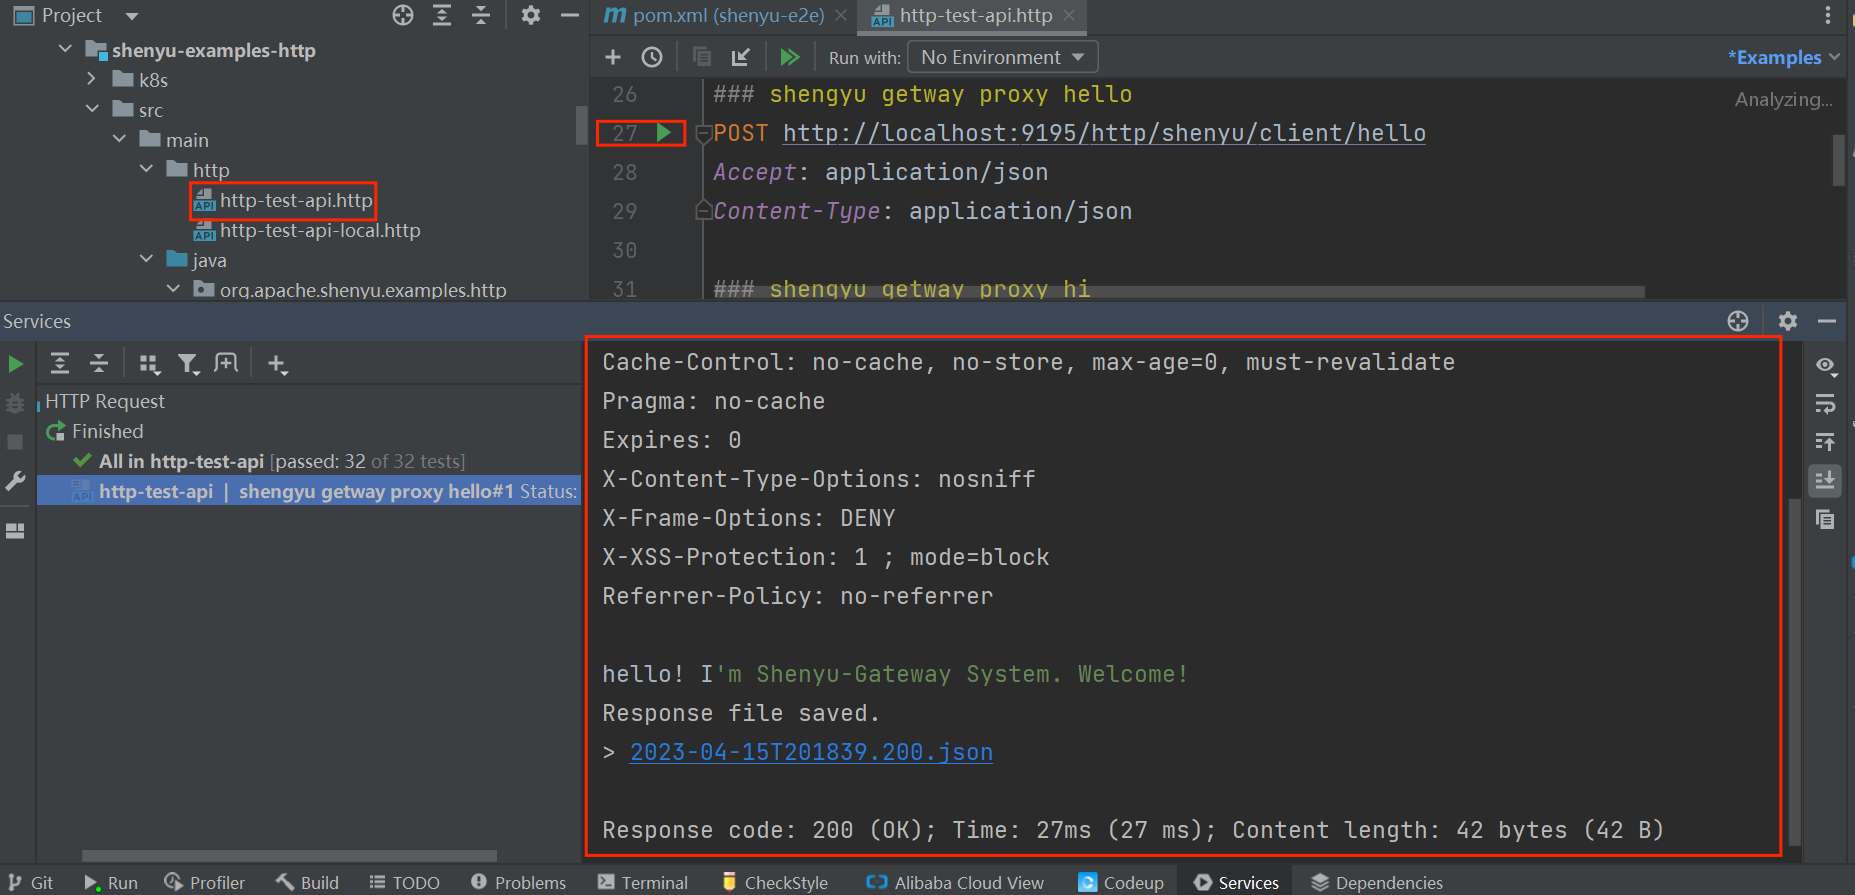
The following uses the IDEA HTTP Client Plugin to mock http to access http services.
-
Local access without using shenyu proxy
-
Use shenyu proxy
Use more plugins
We can refer to the official documentation to the left of Plugins collection to use the required plugins.
Shenyu Front End Startup Guide
Install Node.js
Download
-
Download and install Node.js from official website and select
LTSversion. -
When installing, except for setting the installation path, just keep clicking
Next. -
After the installation is complete, verify at the command line:
C:\Users\pc>node -vv12.22.12C:\Users\pc>npm -v6.14.16
Pull ShenYu Dashboard Code
-
Fork ShenYu Dashboard repository
-
Using Git to download locally
git clone git@github.com:${YOUR_USERNAME}/${TARGET_REPO}.git
Front and Back End Co-development
-
Add
enablePrintApiLog: trueto theshenyu-admin/src/main/resources/application.ymlfile in the backend repositoryshenyuas shown below to show the log of frontend interface calls in the backend console.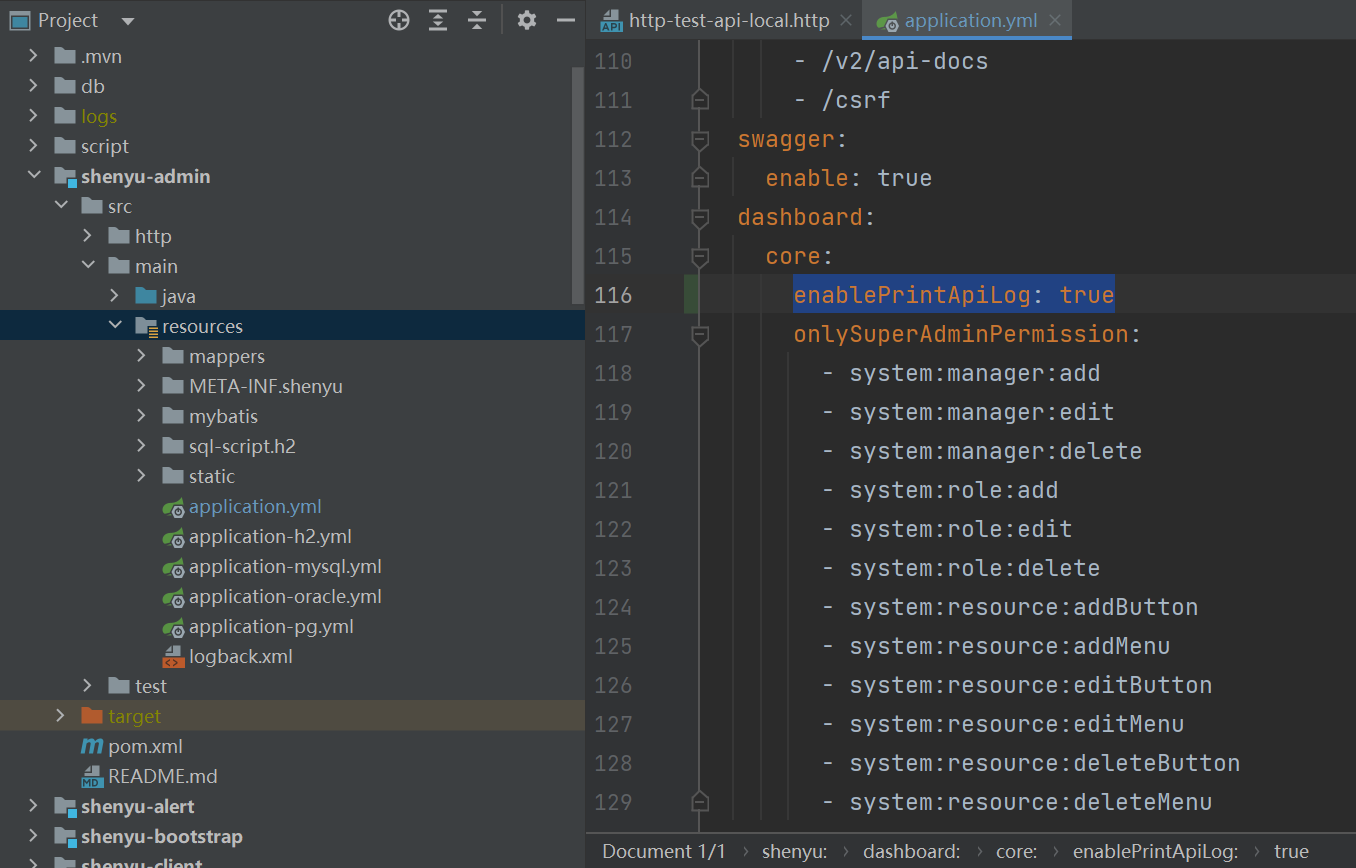
-
Start
ShenyuAdminBootstrap -
Switch to the front-end repository
shenyu-dashboard, openREADME, clicknpm install,npm startor enter the above command from cmd to access the front-end interface via http://localhost:8000, and display the log of the front-end interface called in the back-end console. Realize the co-development of front-end and back-end.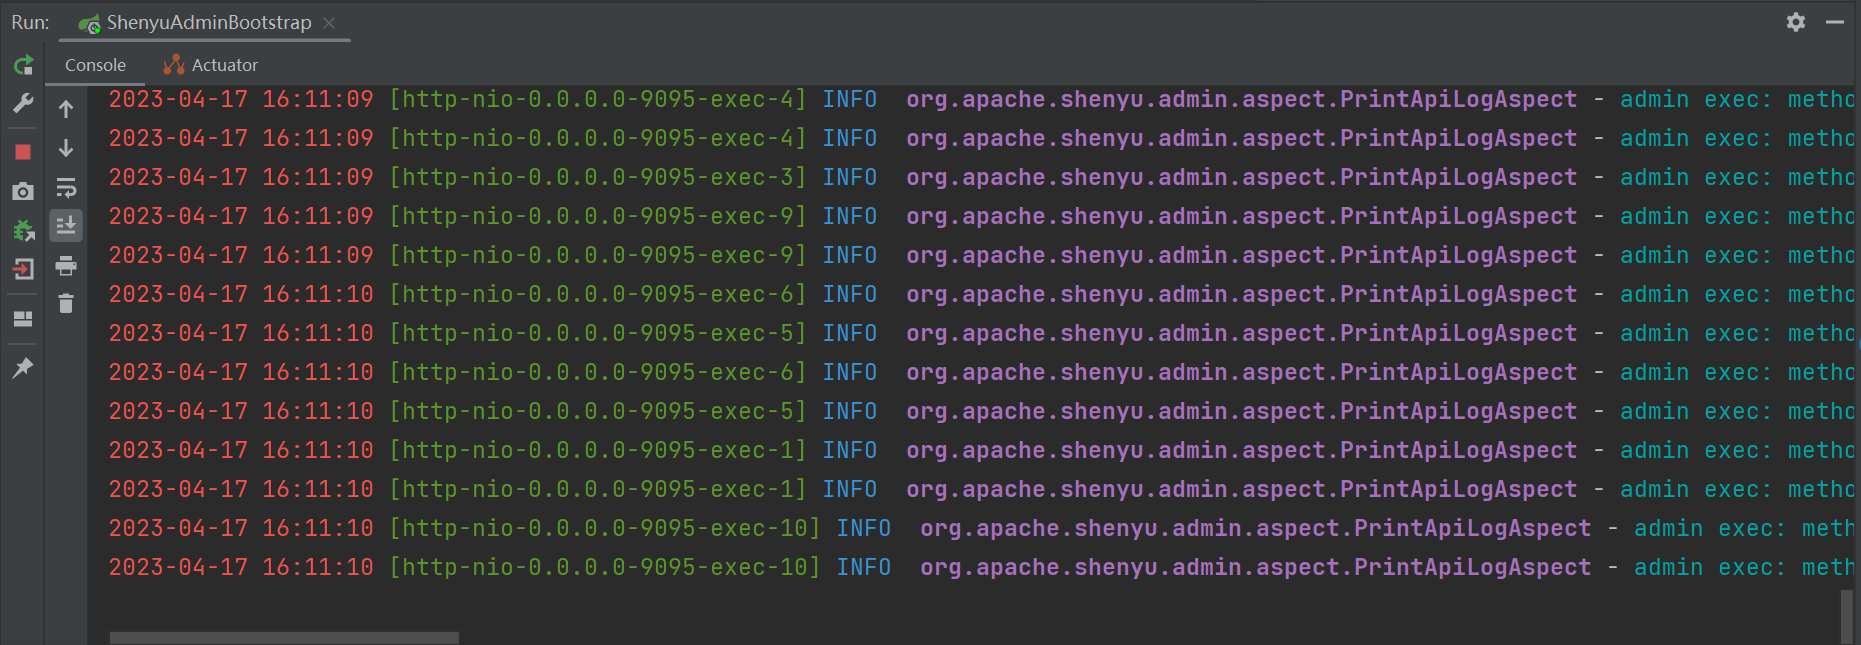
Package Front-end Code
Execute the npm build command in README and copy all the generated files from the dist folder to the shenyu-admin/src/main/resources/static/ directory in the backend repository.
Contribute to Shenyu Official Website
Just follow the README in shenyu-website.
Tips
- I recommend downloading the
LTSversion from theNodewebsite. Windowssystems cannot be deployed, if you want to verify your changes, you can deploy on a Linux virtual machine or server.