1. Overview
1.1 Plugin name
- TCP Plugin
1.2 Appropriate Scenario
- Process TCP protocol requests and forward them to backend services of other TCP protocols
- Service load balancing
1.3 Plugin functionality
- Supports TCP proxy based on configured upstream list
- The upstream list can be hot-synchronized to the gateway by the admin module
- Support setting load balancing policy for requests, currently support shenyu load balancing module policy
- Configurable open port for listening, configurable reactor-netty parameter
- Enable multiple proxy selectors
Note: When a connection is established with the gateway, after the connection is established, the traffic continues to stay in the upstream that has been selected by the load balancing module
1.4 Plugin code
- Core Module:
shenyu-plugin-tcpshenyu-protocol-tcp
1.5 Added since which shenyu version
- 2.6.0
2. How to use plugin
2.1 Enable plugin
- When using it for the first time, start the admin server,
in
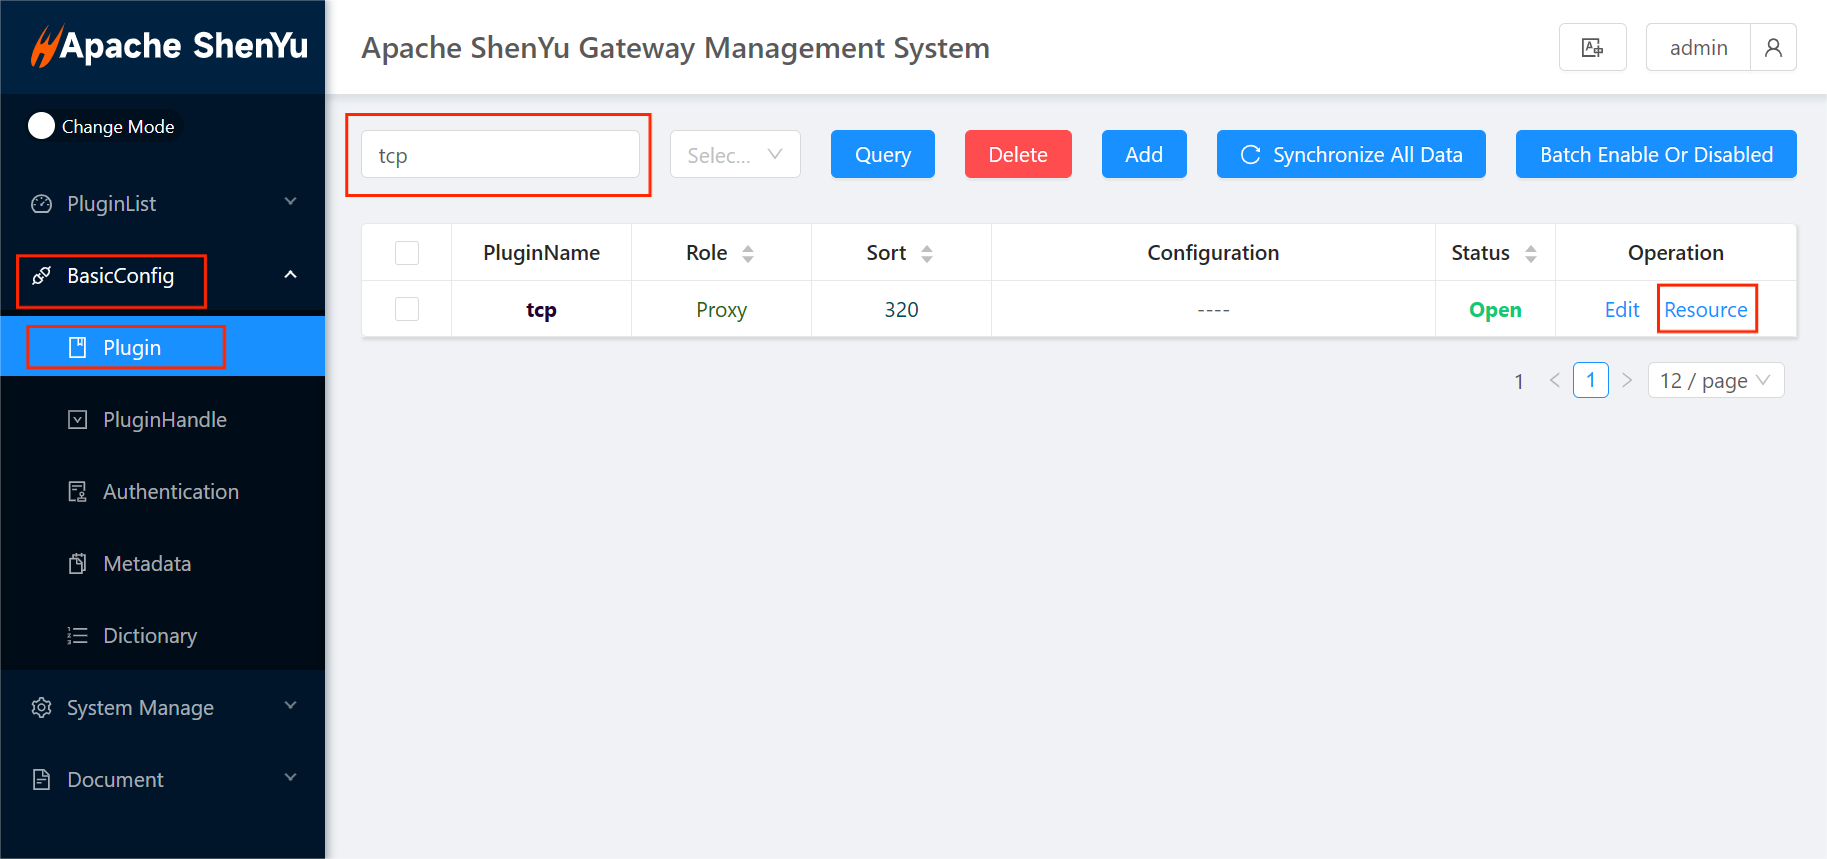
shenyu-admin--> BasicConfig --> Plugin, search for the tcp plugin and click "Resource" to activate the TCP plugin module.
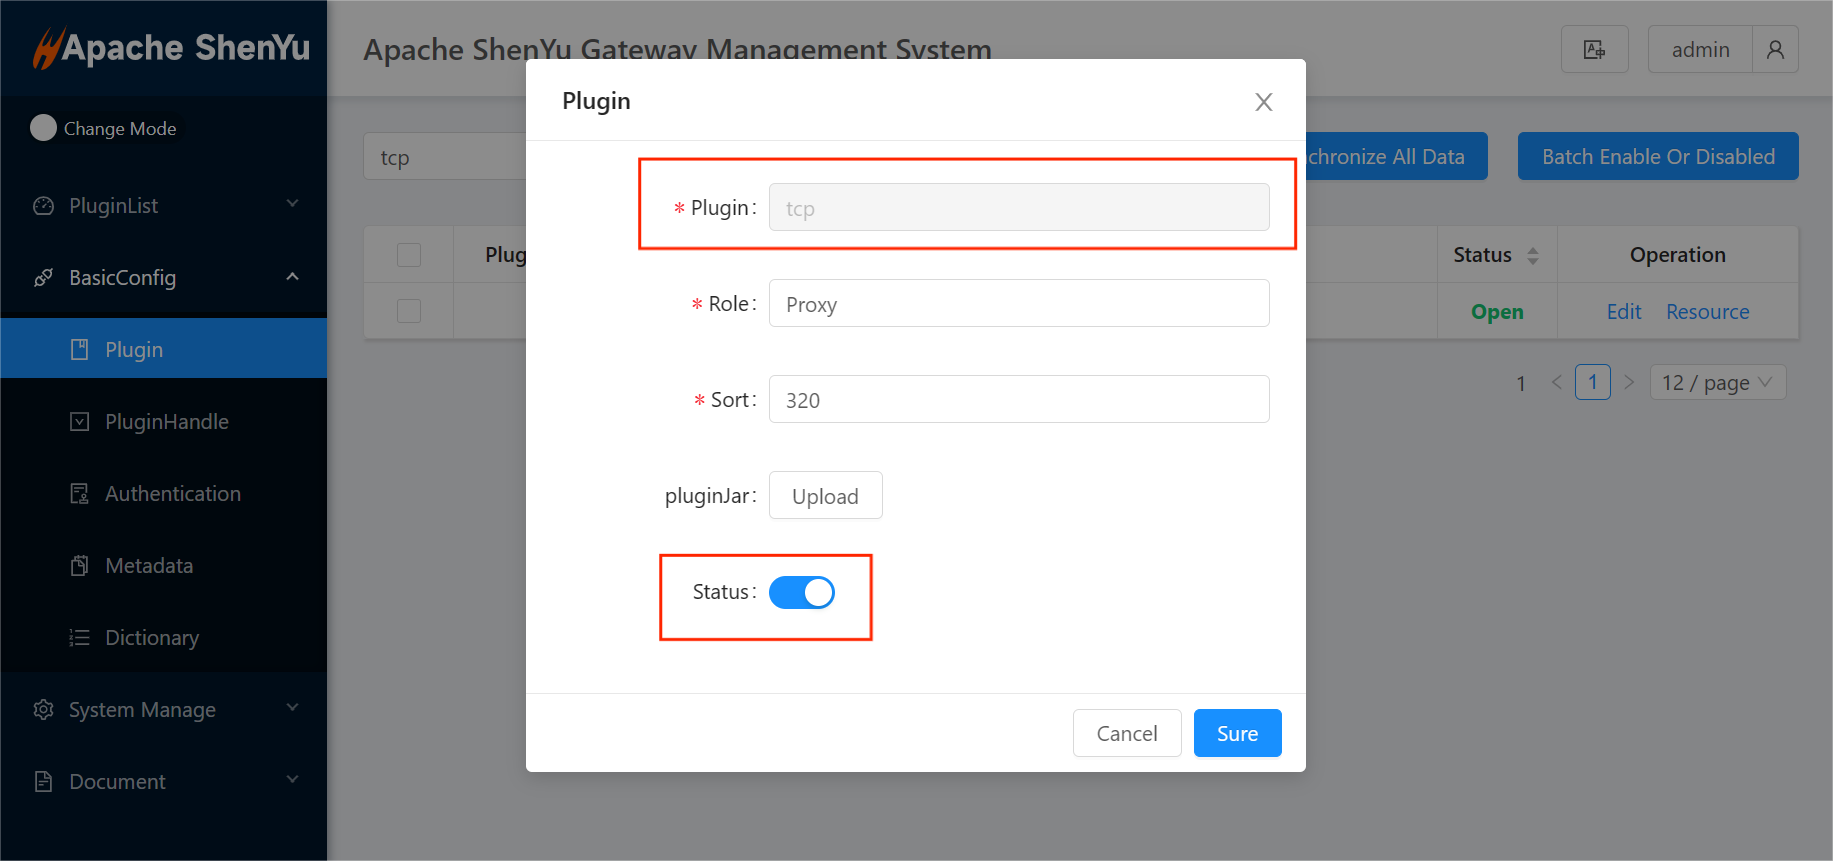
- In
shenyu-admin--> BasicConfig--> Plugin -->tcp, set status enabled.
2.2 Configure plugin
- The TCP plugin is created in units of proxy-selectors, so configuring the plugin is to configure the properties of the proxy-selector. When creating a proxy-selector, click the "Add" button on the page, and in the pop-up selector form, you can configure the selector properties:

The default configuration is as follows:
{
  "loadBalanceAlgorithm": "random",
  "bossGroupThreadCount": "1",
  "workerGroupThreadCount": "12",
  "clientMaxConnections": "20",
  "clientMaxIdleTimeMs": "30000",
  "clientMaxLifeTimeMs": "60000",
  "clientPendingAcquireTimeout": "5",
  "clientPendingAcquireMaxCount": "5"
}
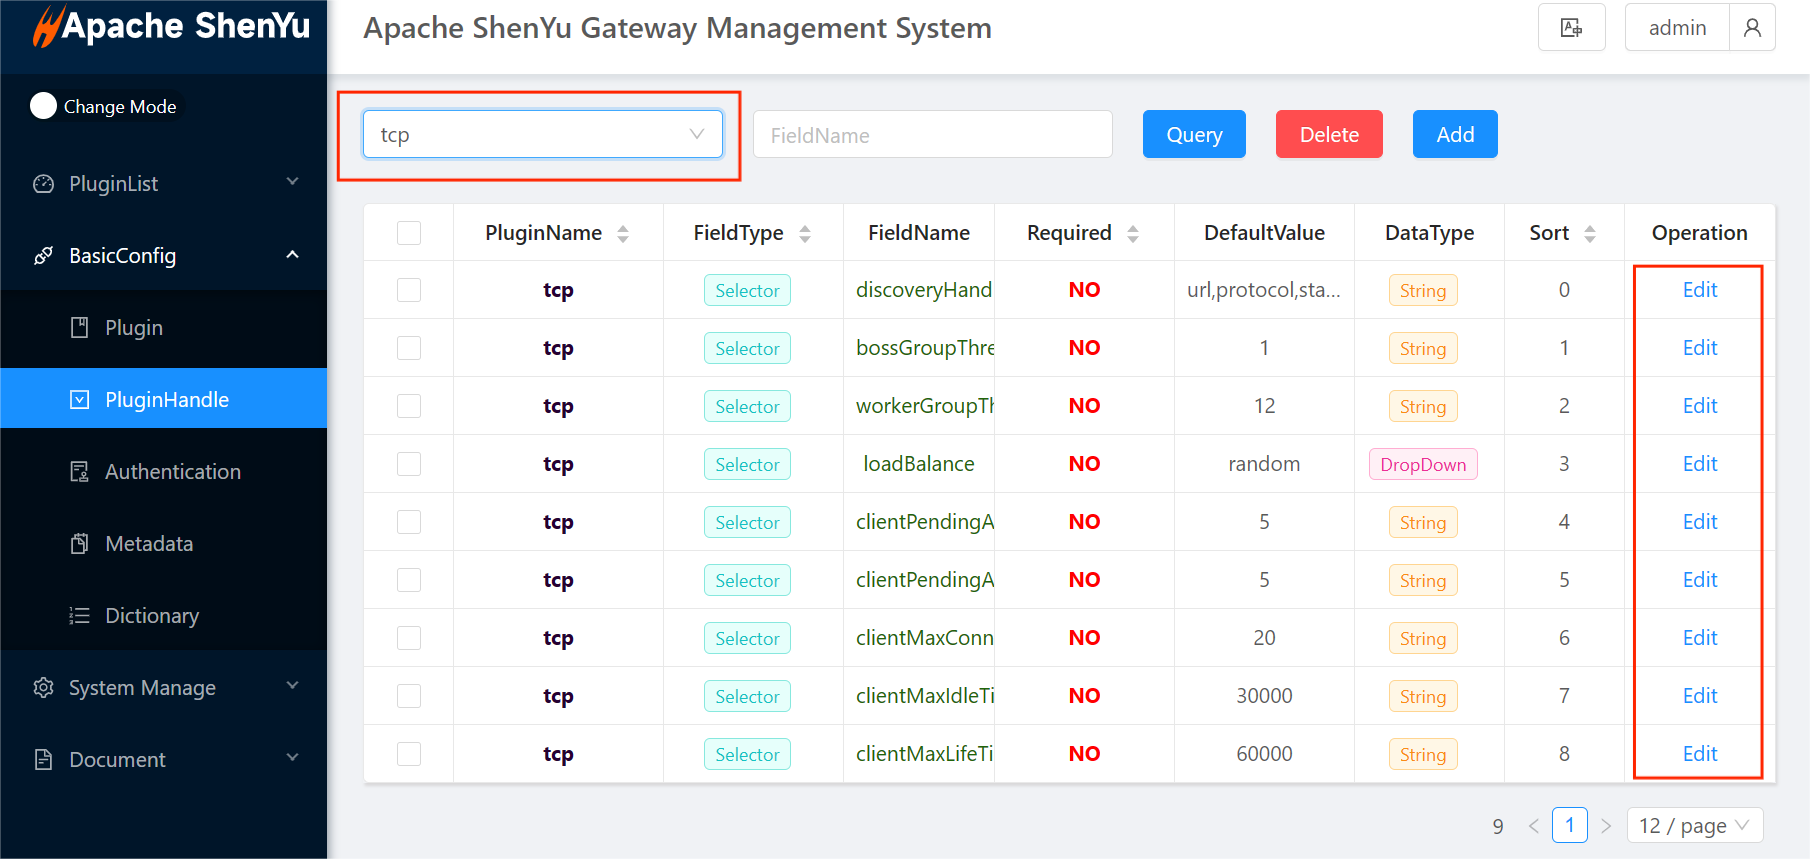
loadBalanceAlgorithm: shenyu load balancing algorithm, random by defaultbossGroupThreadCount,workerGroupThreadCount: ReactorNetty TcpServer For configuration details, seeshenyu-protocol-tcp#TcpBootstrapServer#startfor detailsclientMaxConnections,clientMaxIdleTimeMs,clientMaxLifeTimeMs,clientPendingAcquireTimeout,clientPendingAcquireMaxCountReactorNettyConnectionProvider, seeshenyu-protocol-tcp#ConnectionContextfor details
You can search for the tcp plugin in shenyu-admin --> BasicConfig --> PluginHandle, and modify the default configuration:
2.3 Configure service discovery
discovery see discovery-mode
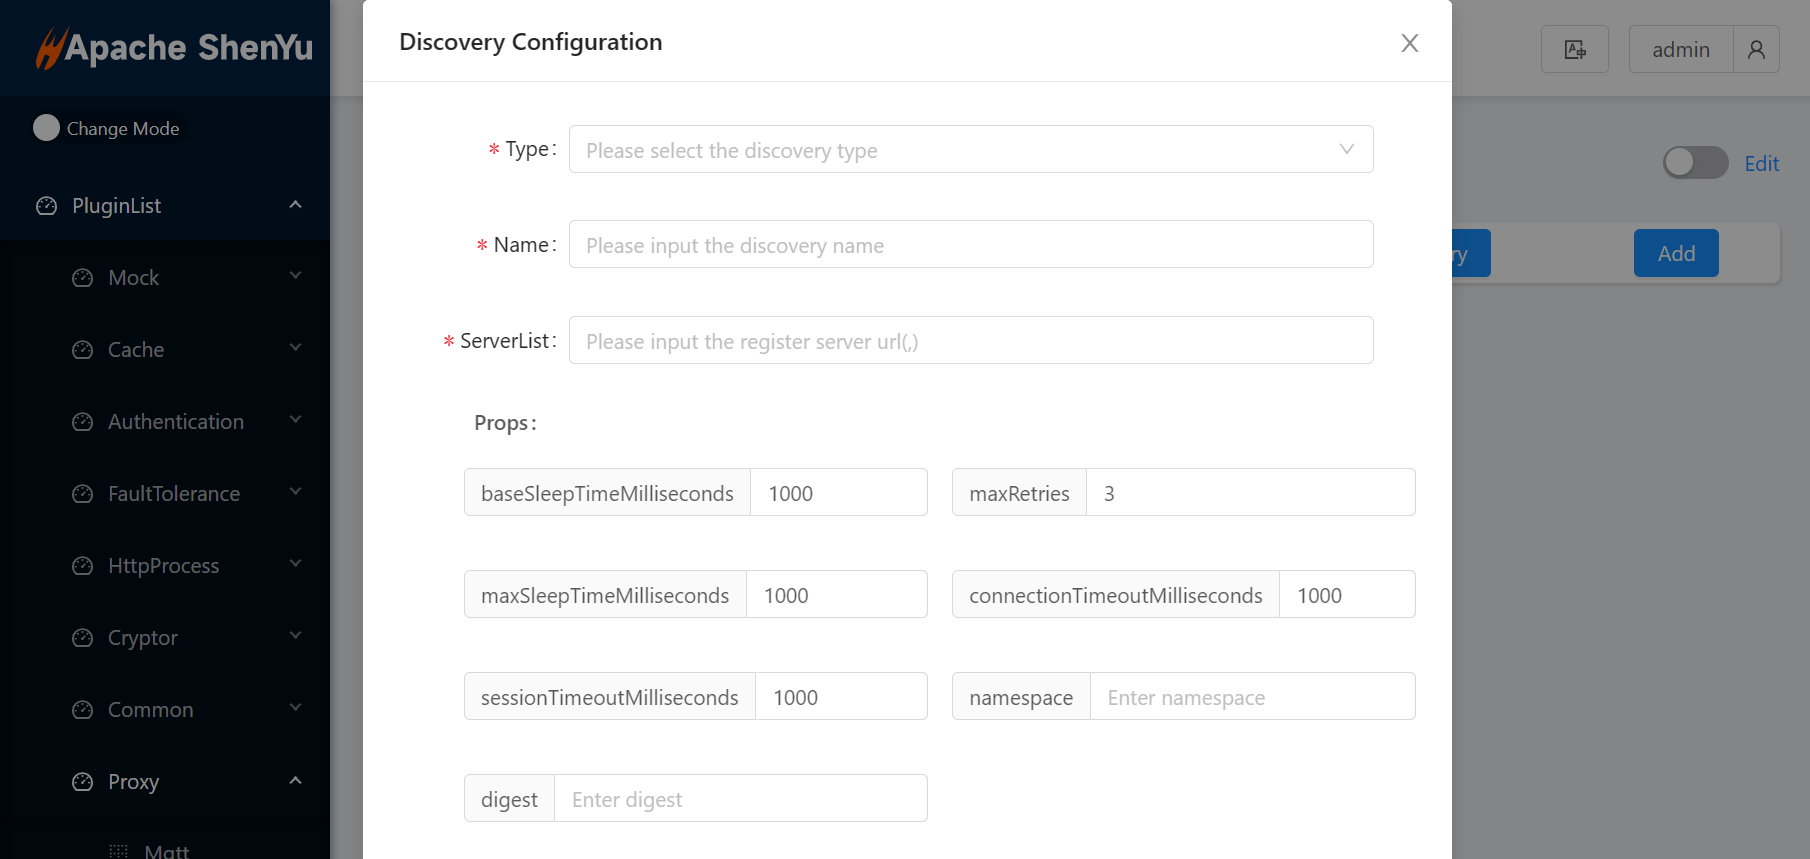
The TCP plugin supports two levels of discovery configuration: plugin-level and selector-level:
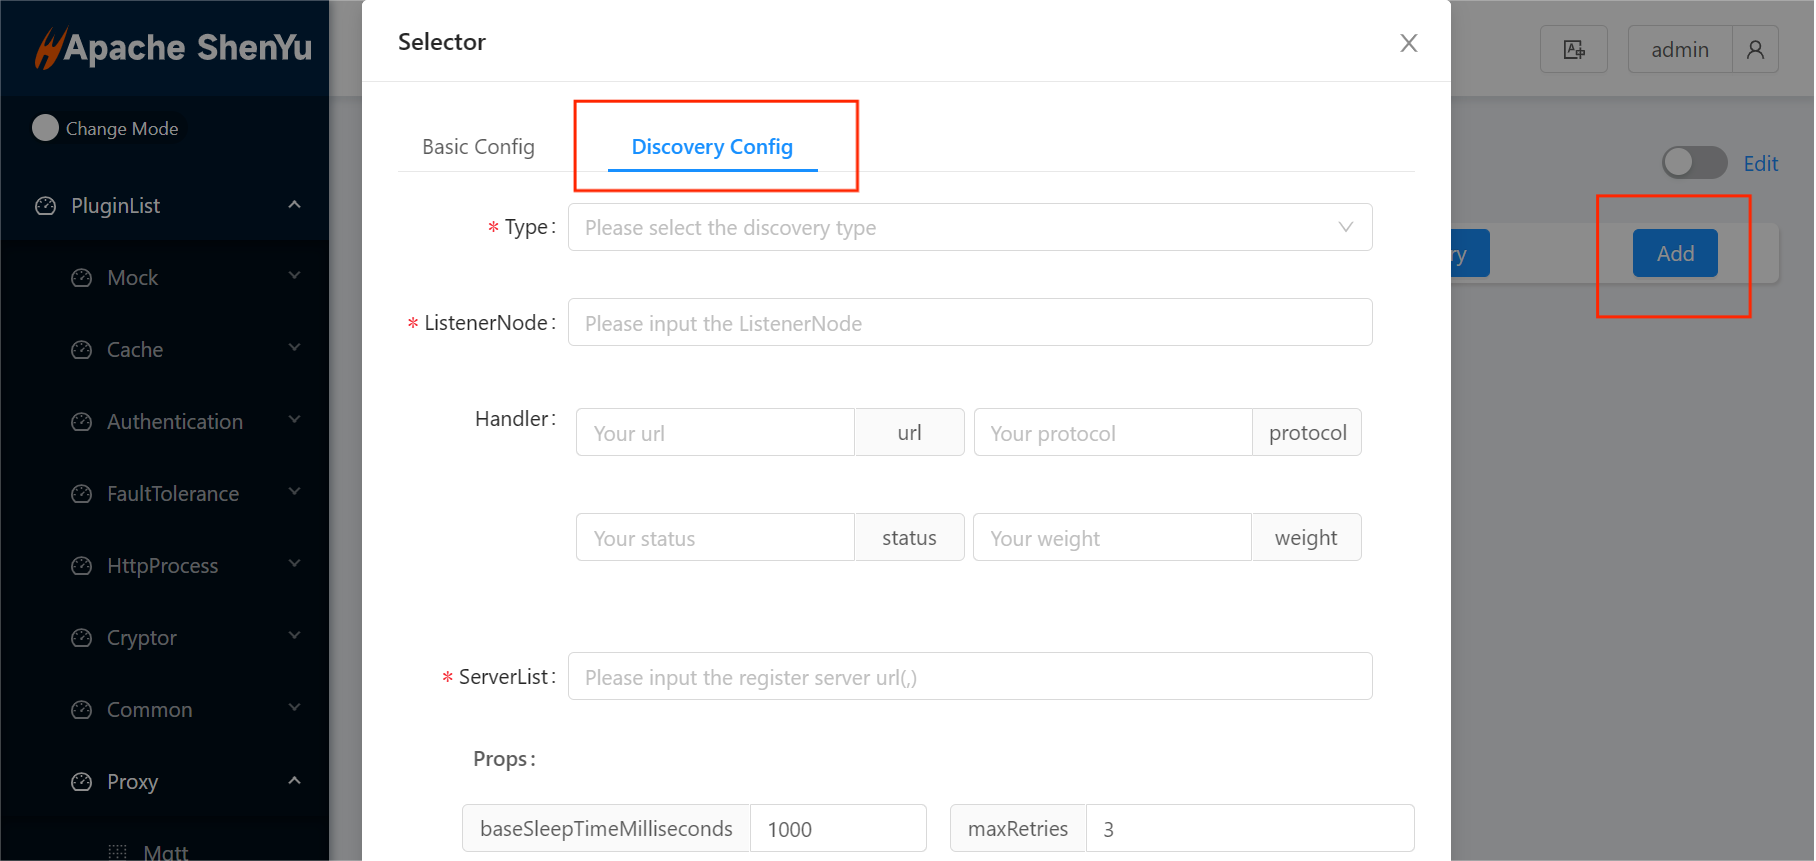
① You can click the "Discovery Configuration" button on the page to configure plugin-level discovery in the pop-up form. After the configuration is complete, you can open the form again to modify or delete the previous configuration. After the plug-in level discovery is configured, the discovery settings of the selectors are consistent with the plugin-level config by default:
② If you have not configured plugin-level discovery, you can configure the selector-level discovery every time you create a proxy-selector:
Discovery Zookeeper and Local modes are currently supported.
2.3.1 Zookeeper Mode
-
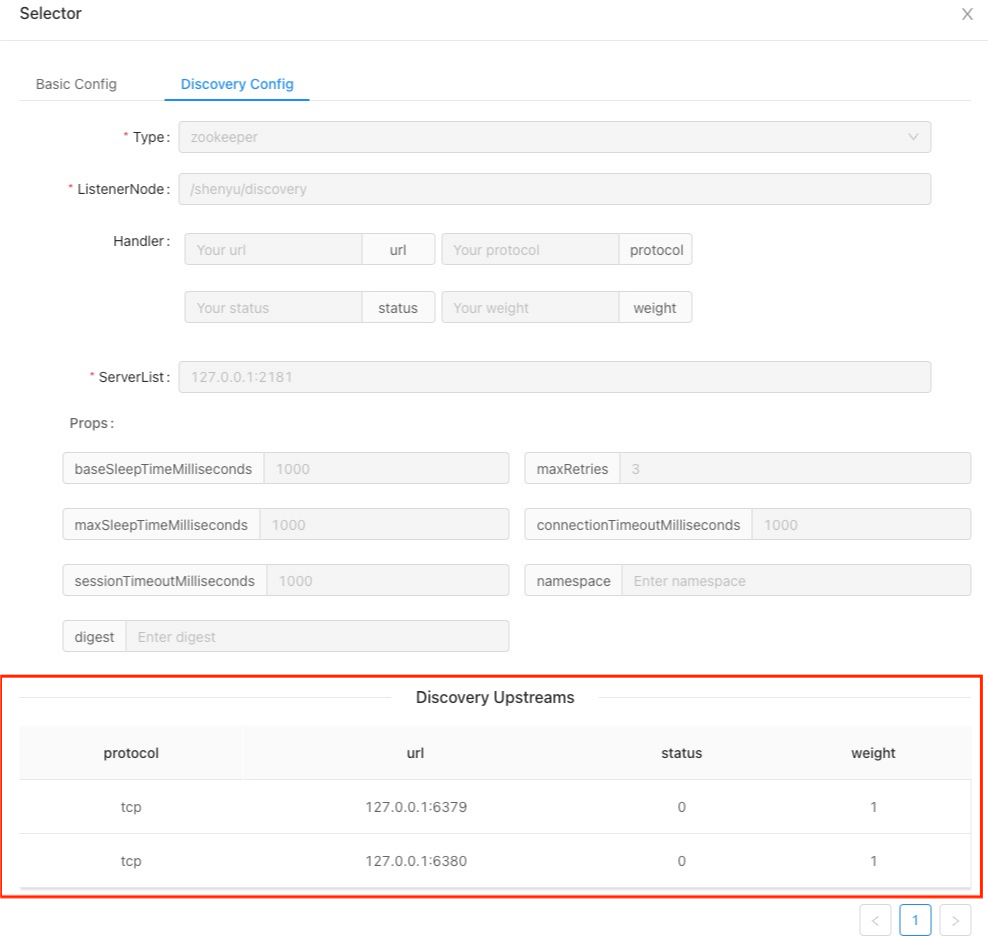
When the type of service Discovery is Zookeeper, you need to fill out the Discovery-ZooKeeper configuration training for details discovery-mode
-
In zookeeper mode, the discovery module will automatically monitor the user's zookeeper registration center and automatically maintain discovery upstreams:
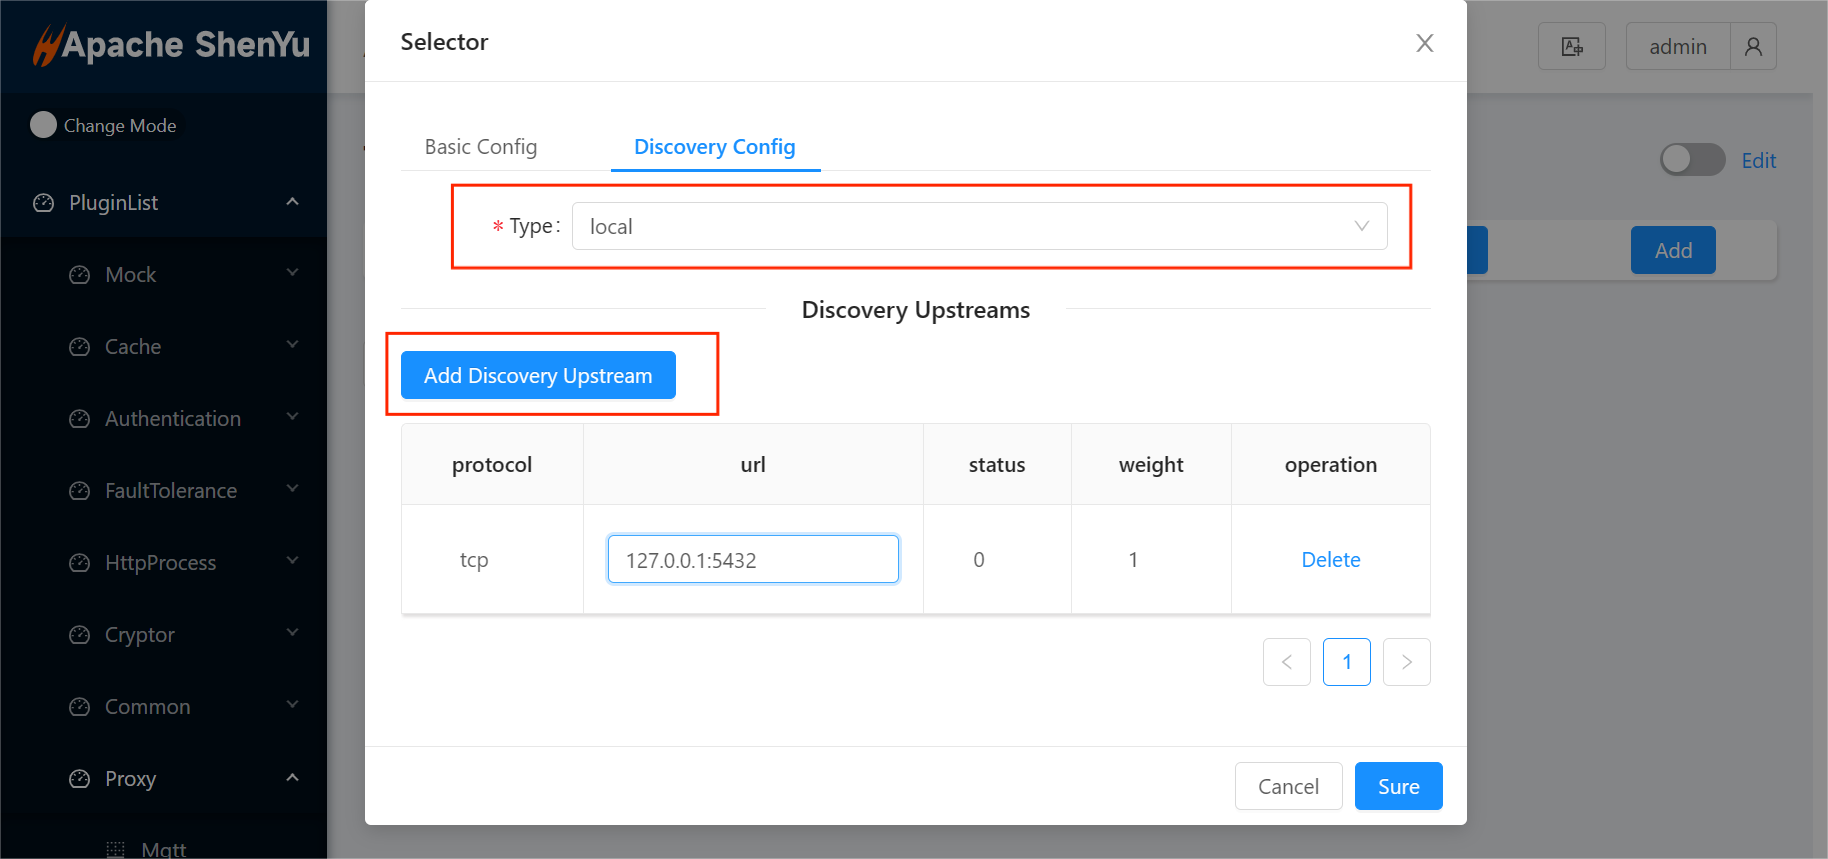
2.3.2 Local Mode
- When "local" is selected as the discovery type, you need to manually fill in the discovery upstream list. As shown in the figure below, the discovery upstream list is an editable table. Double-click each cell to modify the table content:
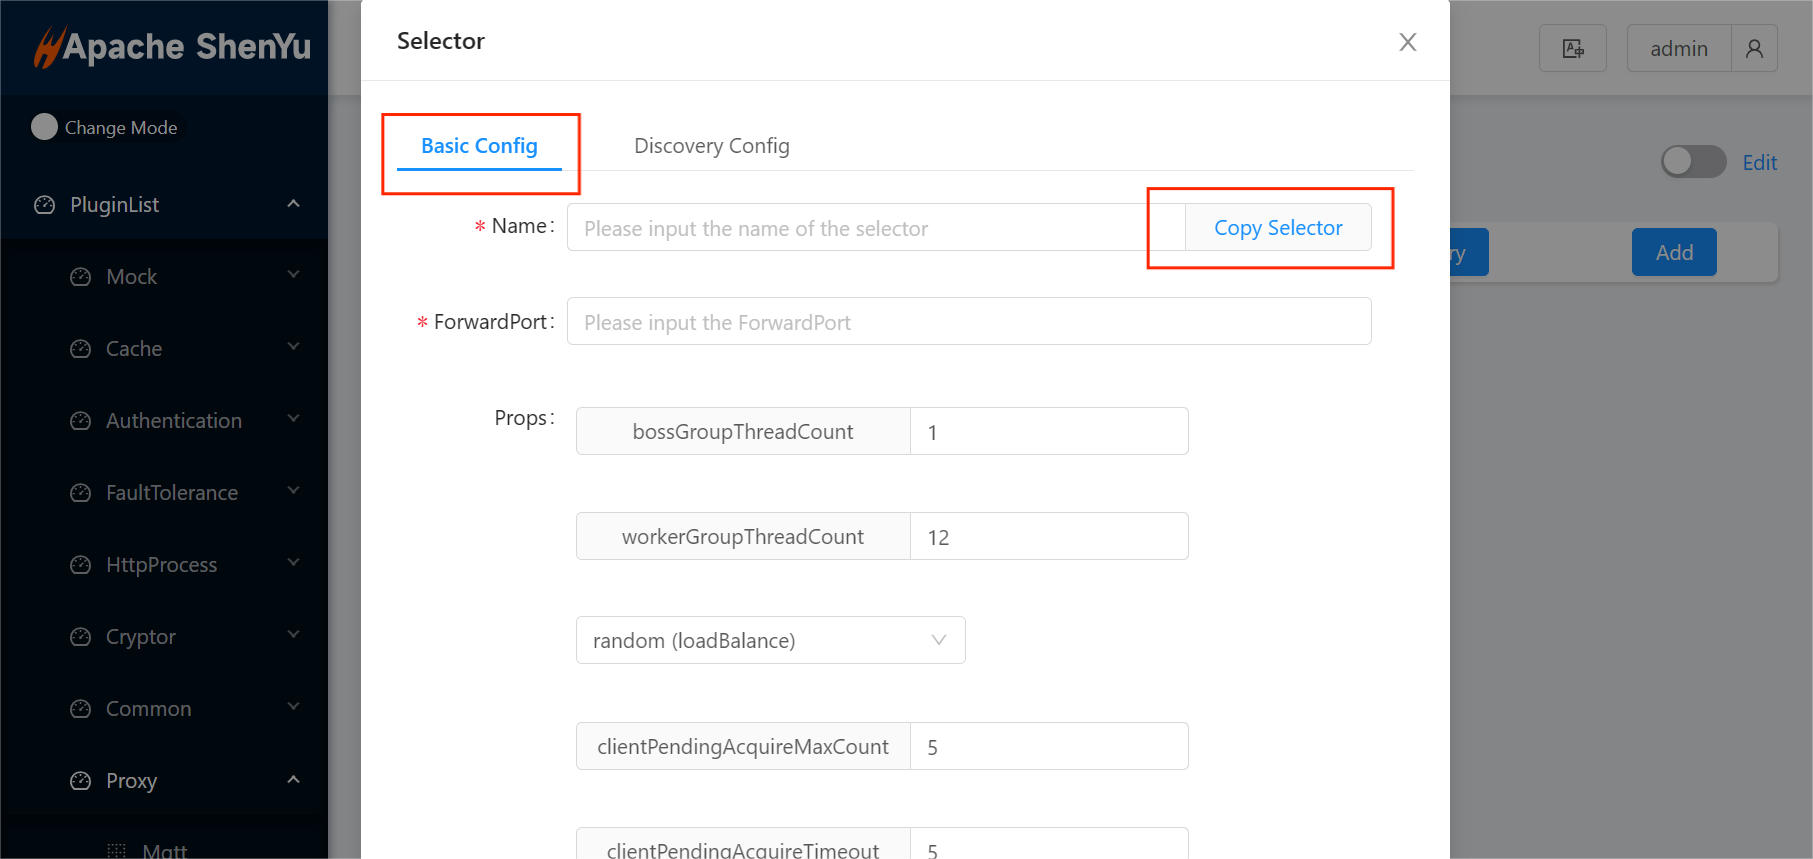
2.4 Configure selectors
- In addition to the discovery configuration above, when creating a selector, you also need to fill in the "basic config" part of the selector, including name and forward port, etc. In order to improve the convenience of filling in, you can click "Copy Selector" to copy part of the information of the created selector.
Note: The name of the selector uniquely identifies the selector and cannot be repeated
- After the selectors are created, the selectors are displayed in the form of cards. When the mouse hovers over the cards, the creation time, update time and properties of the selectors will be displayed. At the bottom of the card there are three clickable icons, from left to right the Sync, Edit, and Delete selector icons:
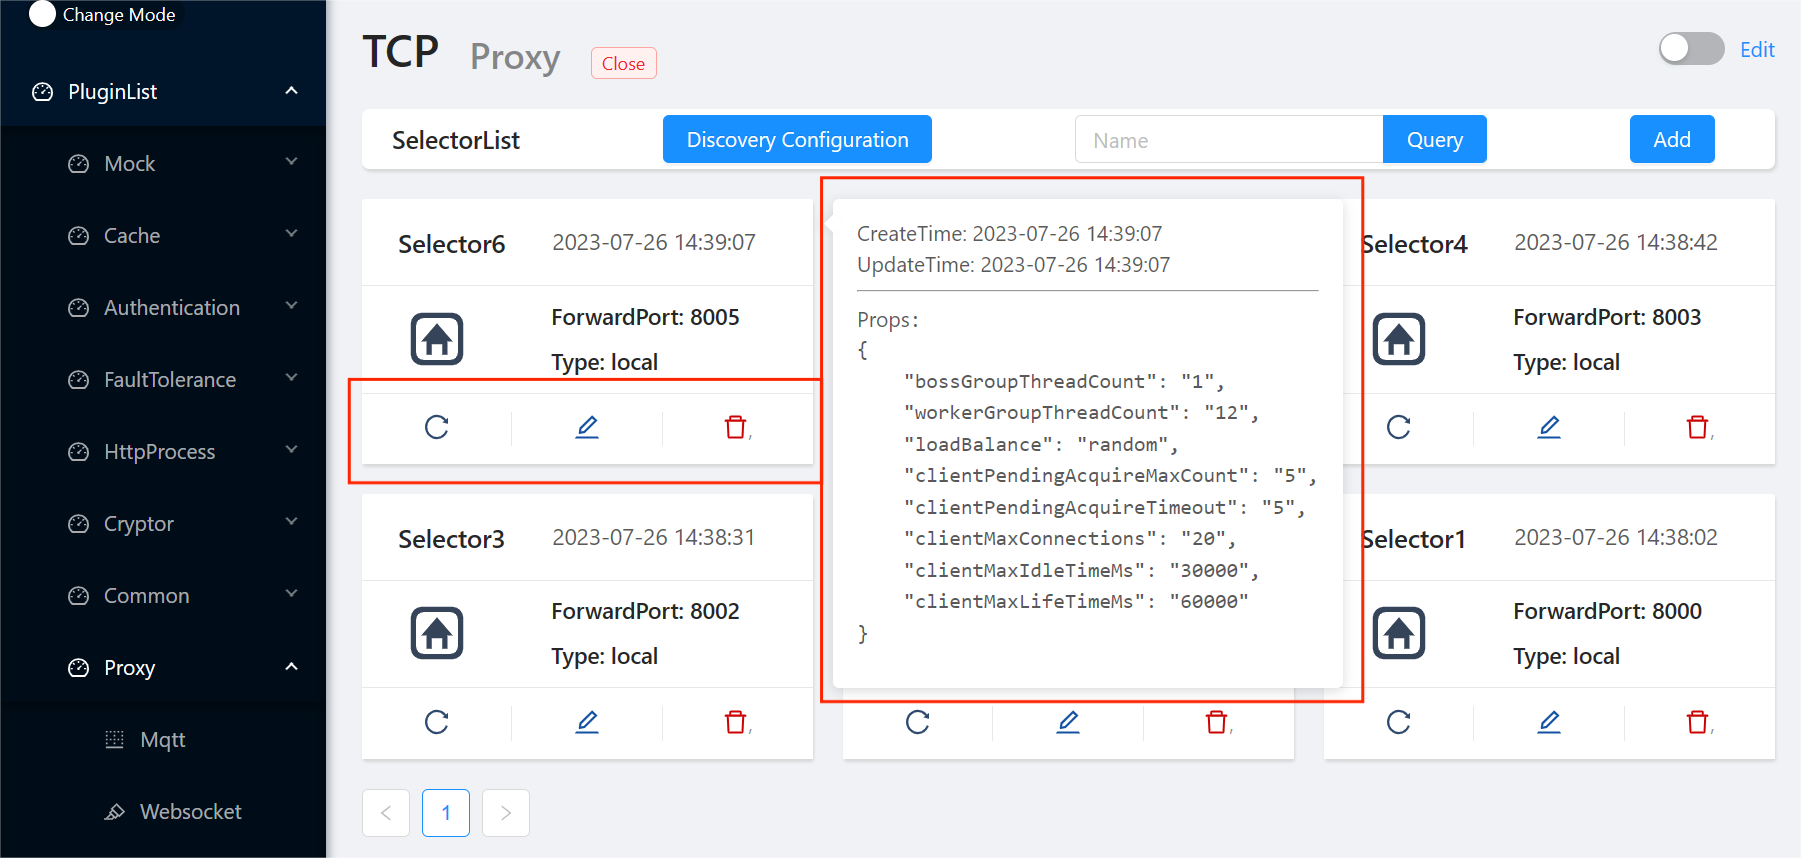
- If there is difference between the discovery upstream list of the current admin and the gateway, you can click the "Sync" icon to force synchronization to the gateway.
2.5 Shenyu log
-
shenyu-gateway port start log

-
shenyu-gateway proxy upstreamList‘s success log

2.6 Example
Take proxying redis as an example, use redis-cli -p {forwardPort} to access.
